Latest version: 4.3.x
Webhooks (Email)
To configure real-time email alerts for your Streaming Data platform including your Apache Kafka infrastructure and real-time applications (consumer & producer SLAs) you can leverage Webhooks. This article contains instructions on how to set up alert notification channels using API services such as:
- Twilio and SendGrid
- Zapier
Twilio and SendGrid
To set up a notification channel, you will need a SendGrid account https://signup.sendgrid.com and to setup a SendGrid API Key and Sender Authentication.
SendGrid setup
1. Log-in your SendGrid account, click on Settings and then API Keys:
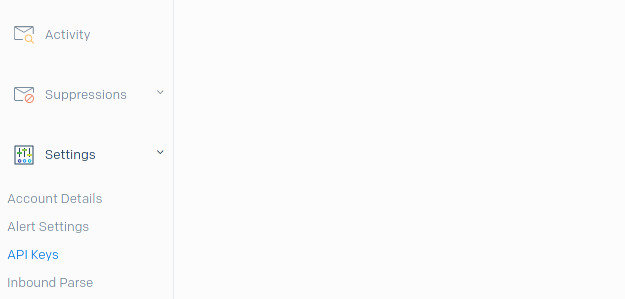
Click the Create API Key button, give a name to your API Key and complete the action with Create & View. Make sure you note the resulting key, as we will need to use it later on.
2. Sender Authentication
To validate the email source is one that you control, Sendgrid requires a Sender Authentication process. Click Settings and then Sender Authentication:
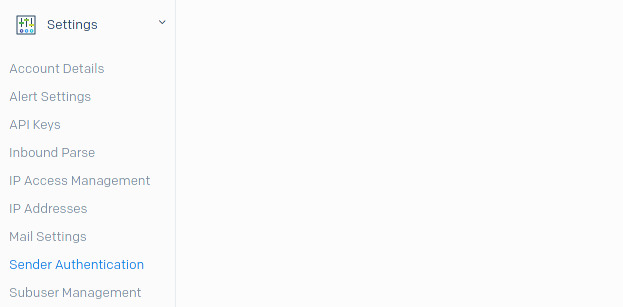
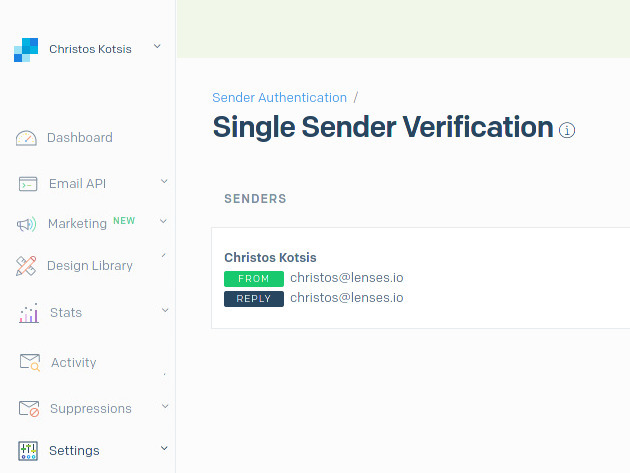
Click Create New Sender, fill in the required information and Create. The important fields are:
| Setting | Description |
|---|---|
| From | The email address that will be sending email notifications |
| Reply To | The email address to forward to if there is a reply to the email sent |
Webhook setup
1. In Lenses, visit Admin → Connections and click New connection
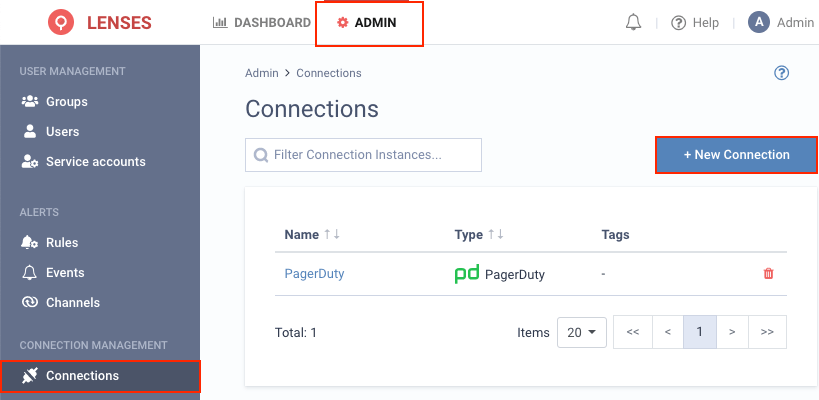
2. Select Webhook
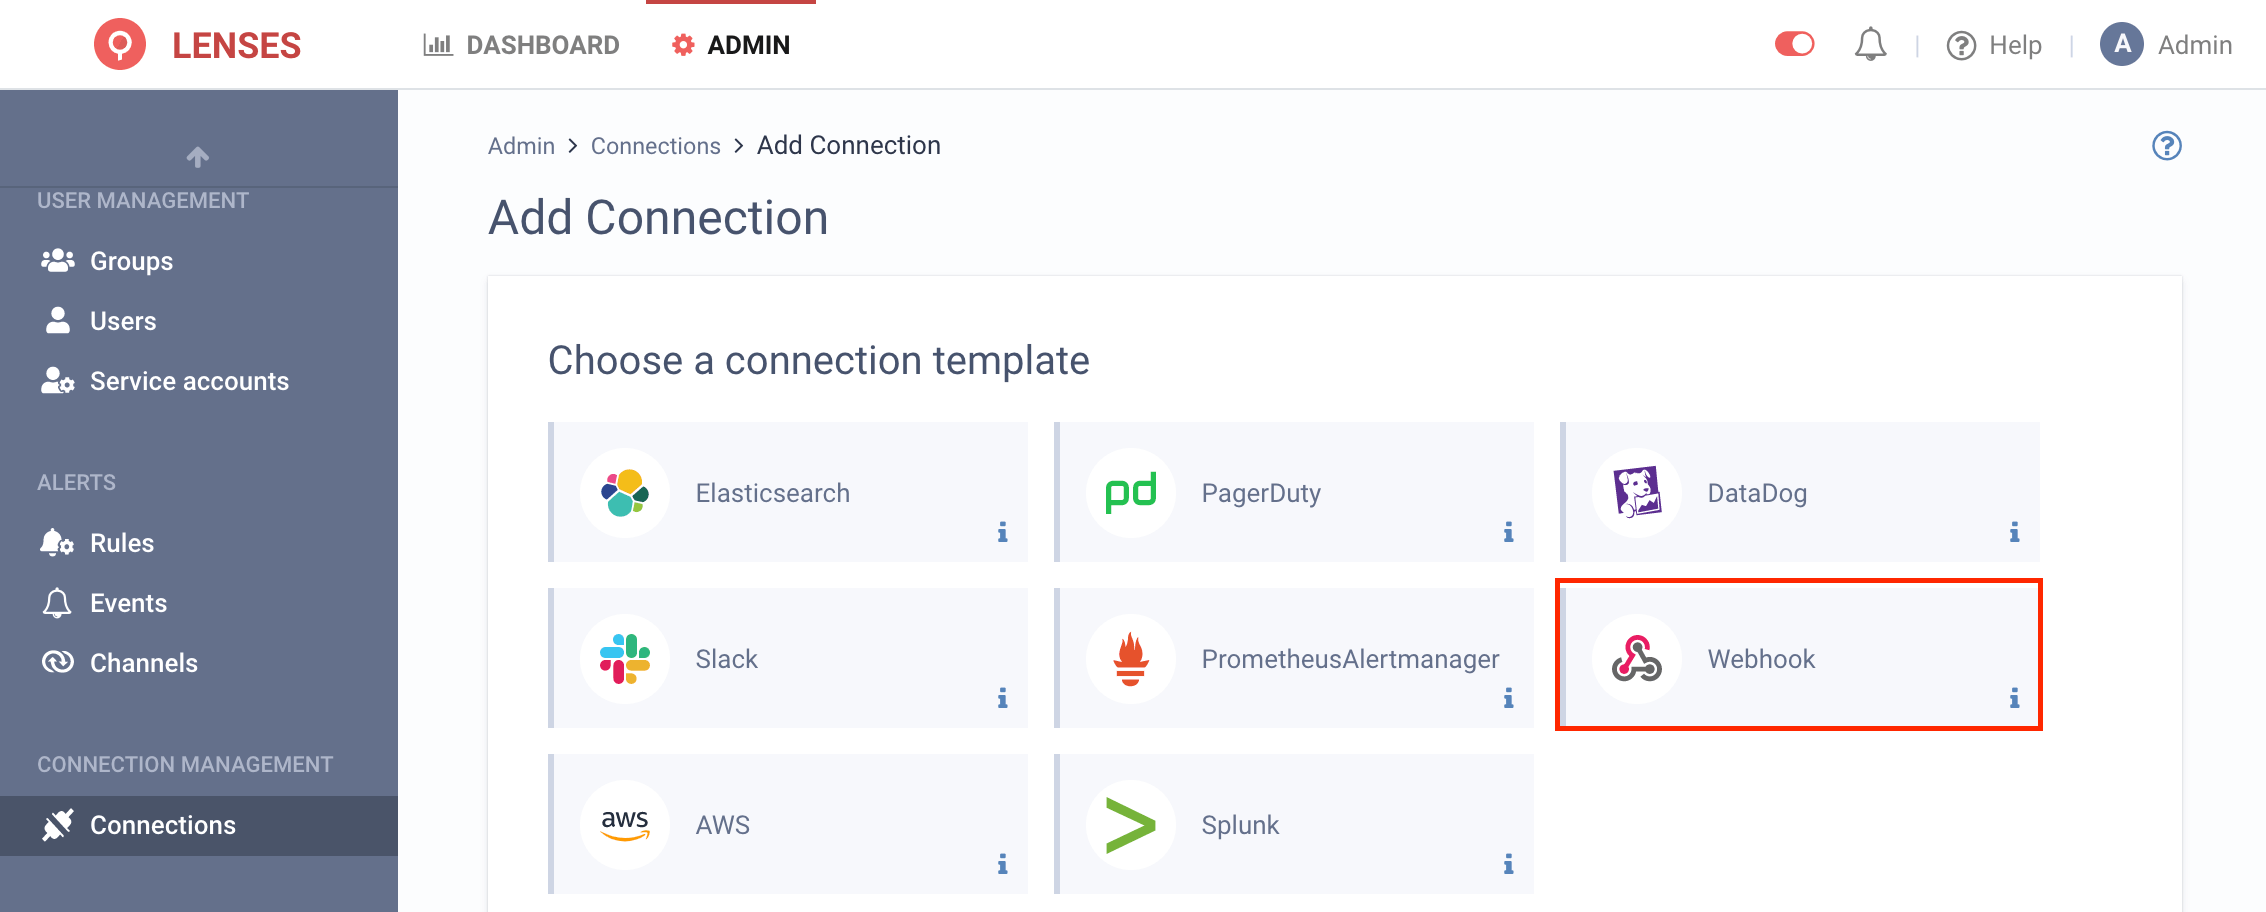
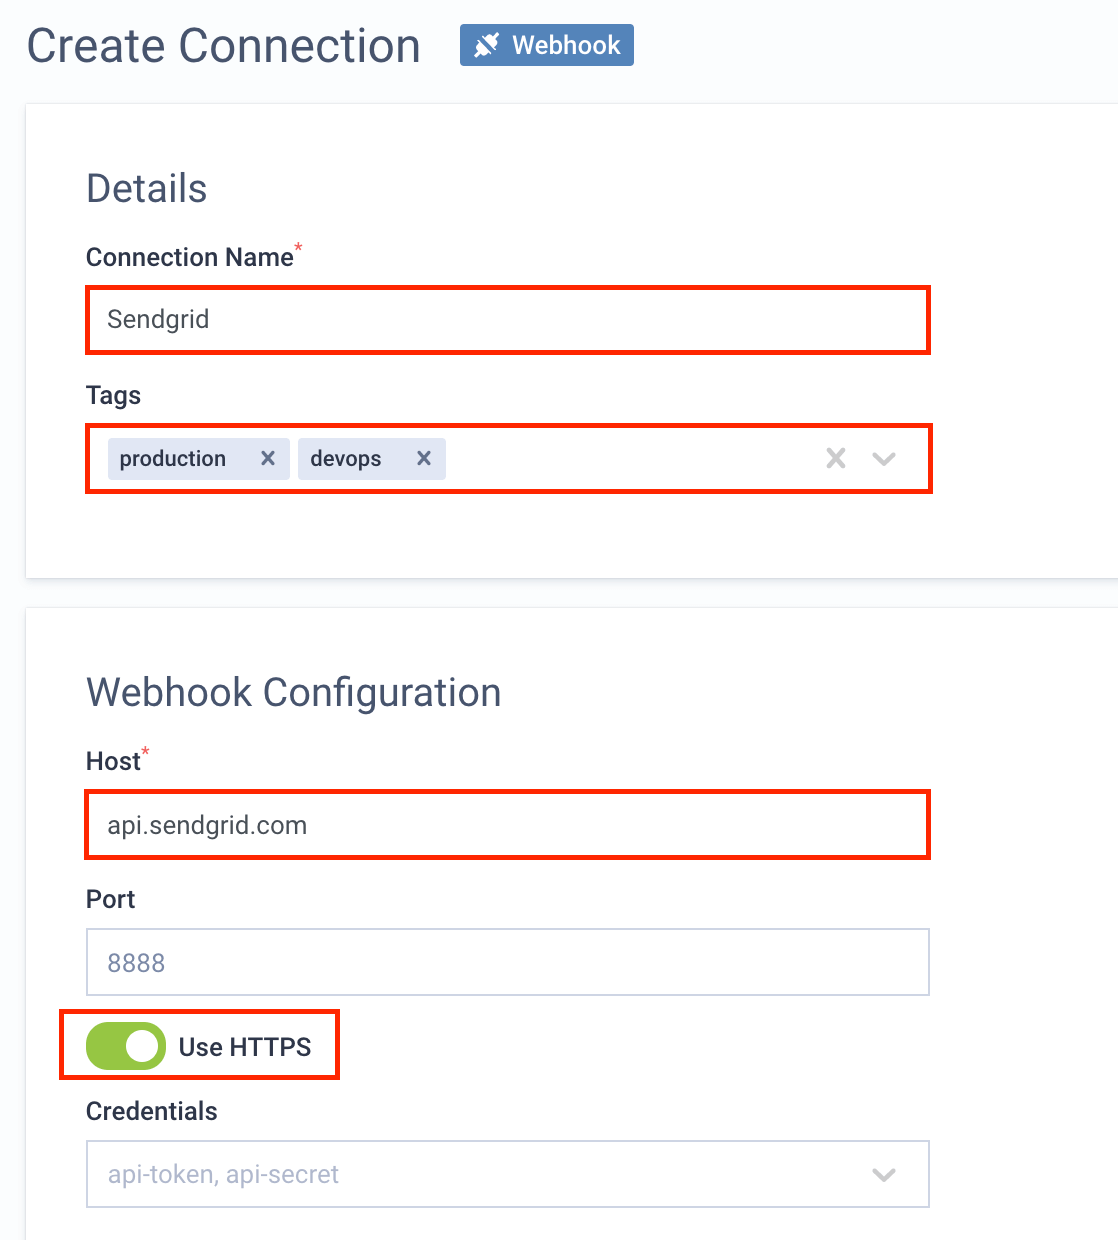
3. Add the connection name and configuration for the webhook towards api.sendgrid.com and enable HTTPS
4. Visit Admin → Channels and click Webhook
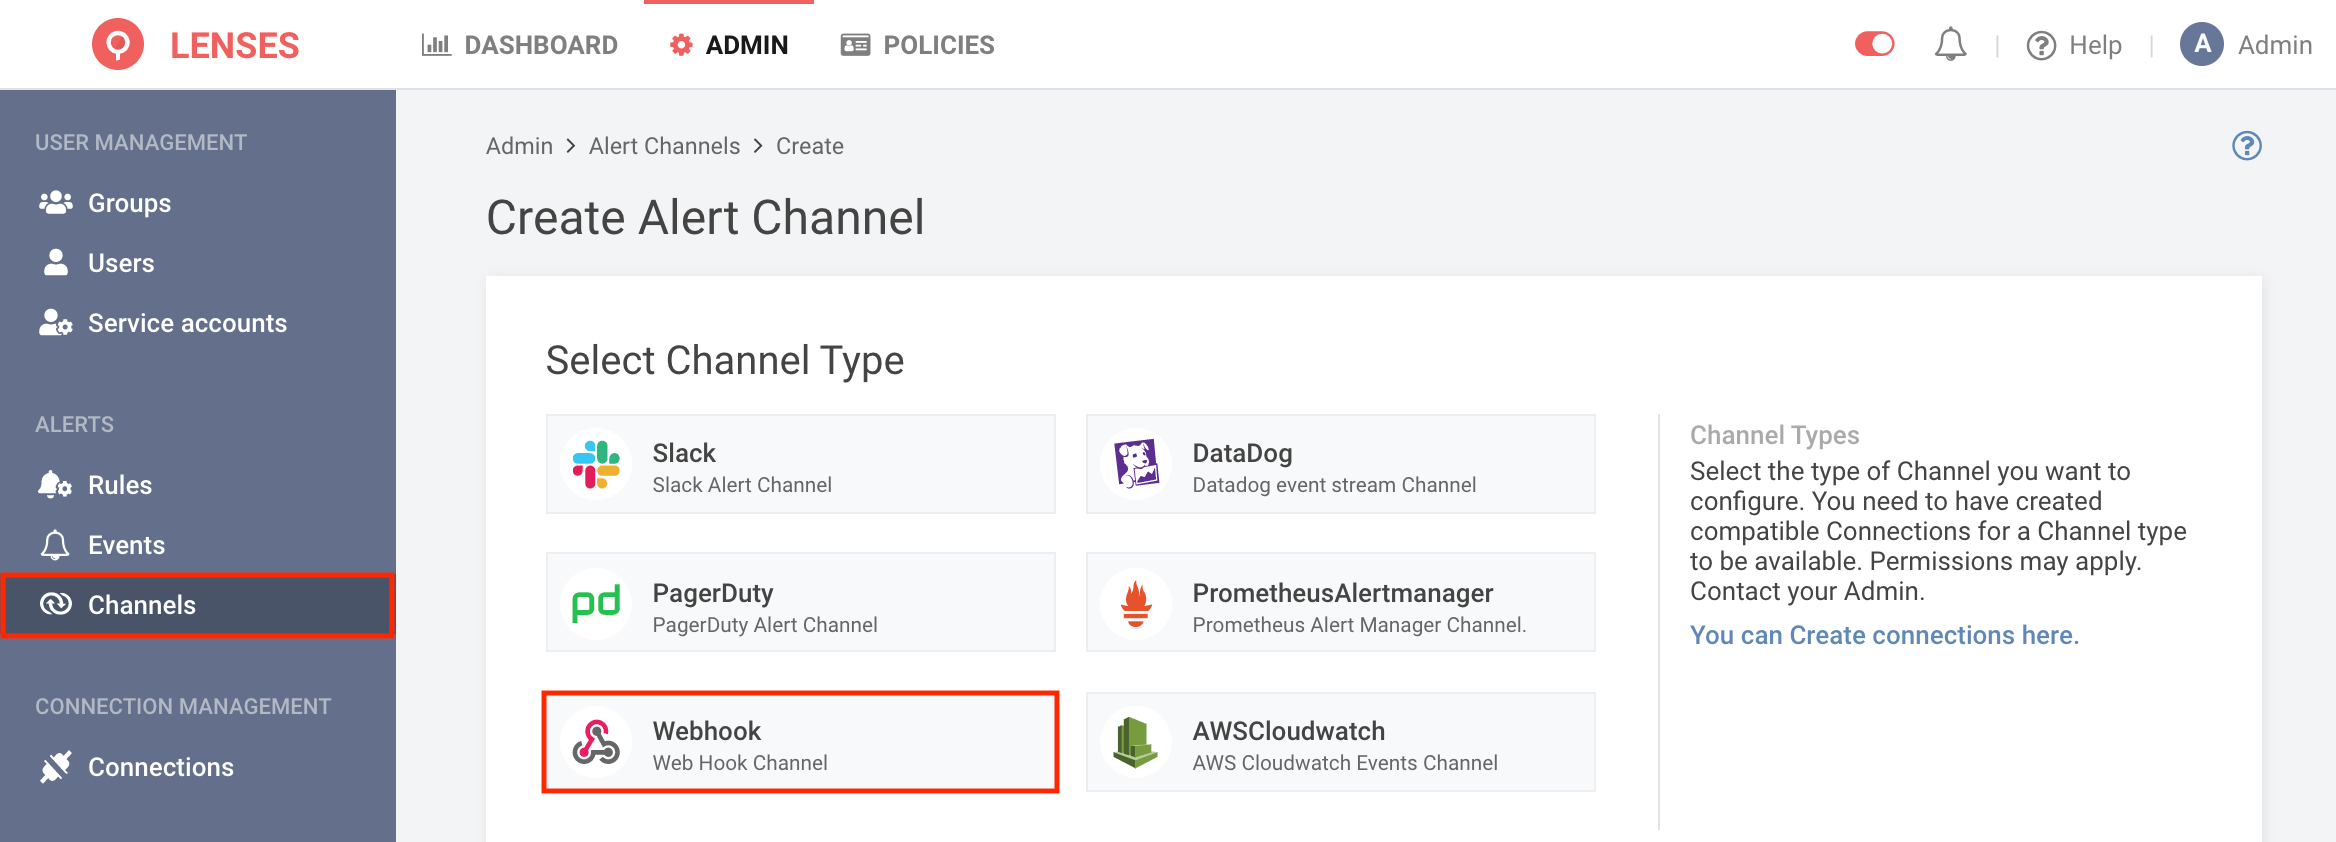
And configure the new notification channel:
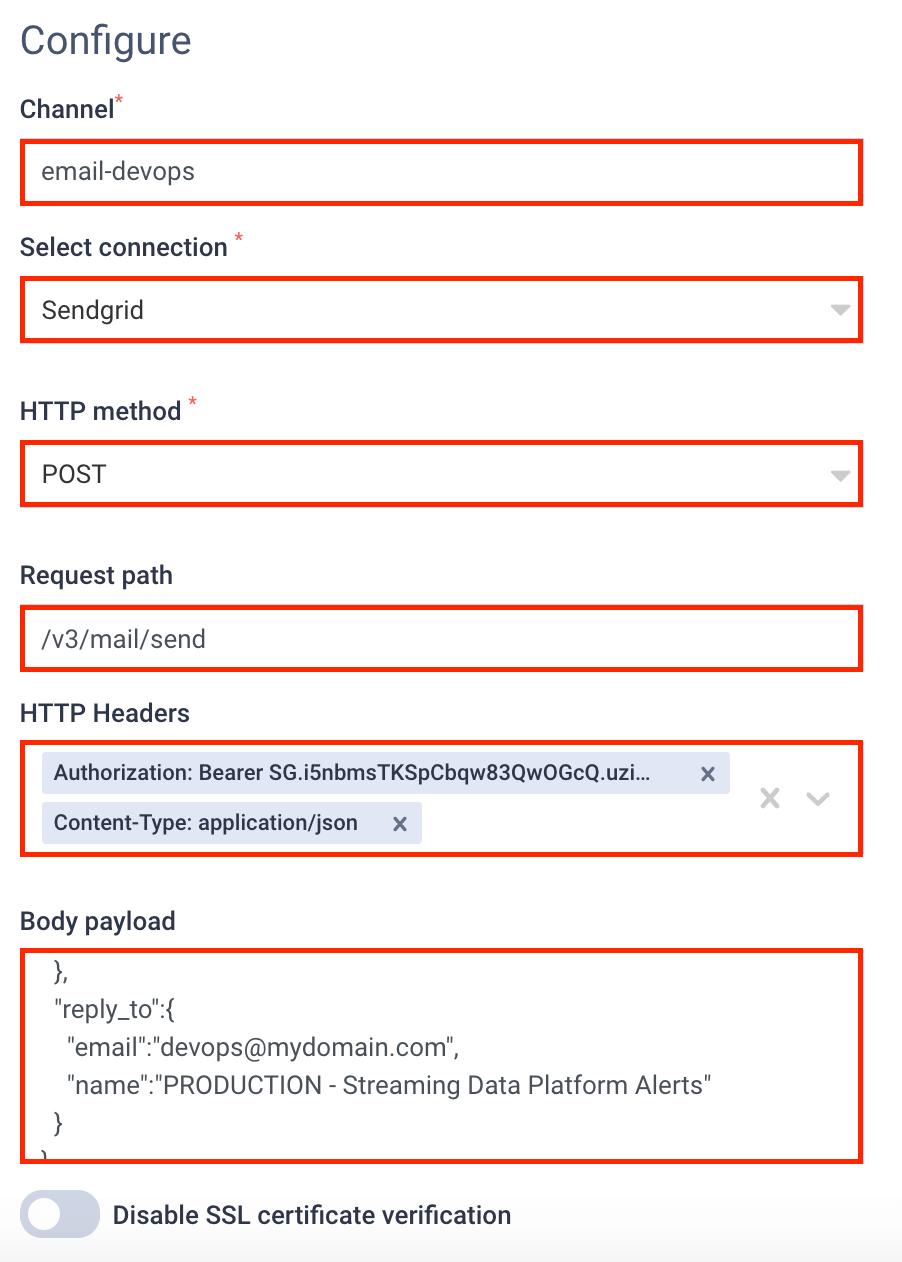
Name your notification channel and use the Sendgrid connection to POST requests to the /v3/mail/send Sendgrid API with the appropriate security headers and payload:
| HTTP Headers |
|---|
| Authorization: Bearer [your-Sendgrid-API-Key] |
| Content-Type: application/json |
For the payload of the body, use and augment the snippet bellow:
{
  "personalizations":[{
    "to":[{
      "email":"devops@mycompany.com",
      "name":"DevOps & SRE team | MyCompany"
    }],
    "subject":"PRODUCTION | Streaming Data Platform Alert"
  }],
  "content":[{
    "type":"text/html",
    "value":"<html><body><p>Priority Level:{{LEVEL}}</br></br>Category: {{CATEGORY}}</br><br>Description: {{SUMMARY}}</br><small>Alert ID: {{ID}}</small></p></body></html>"
  }],
  "from":{
    "email":"sender-email-address",
    "name":"sender name ie. PRODUCTION | Streaming Data"
  },
  "reply_to":{
    "email":"reply-to-email-address",
    "name":"reply to name"
  }
}
Change the above payload according to your requirements, and remember that the [sender-email-address] needs to be the
same email address you registered during the Sender Authentication Sendgrid setup process.
You are now ready to use the above notification channel to send Kafka infrastructure, Kafka Producer and Kafka Consumer alerts to that email address.
Zapier
To set up a notification channel, you will need a Zapier account https://zapier.com/sign-up and setup a new Zap. Zapier can be very versatile, and in the following example we will use GMail.
Zapier setup
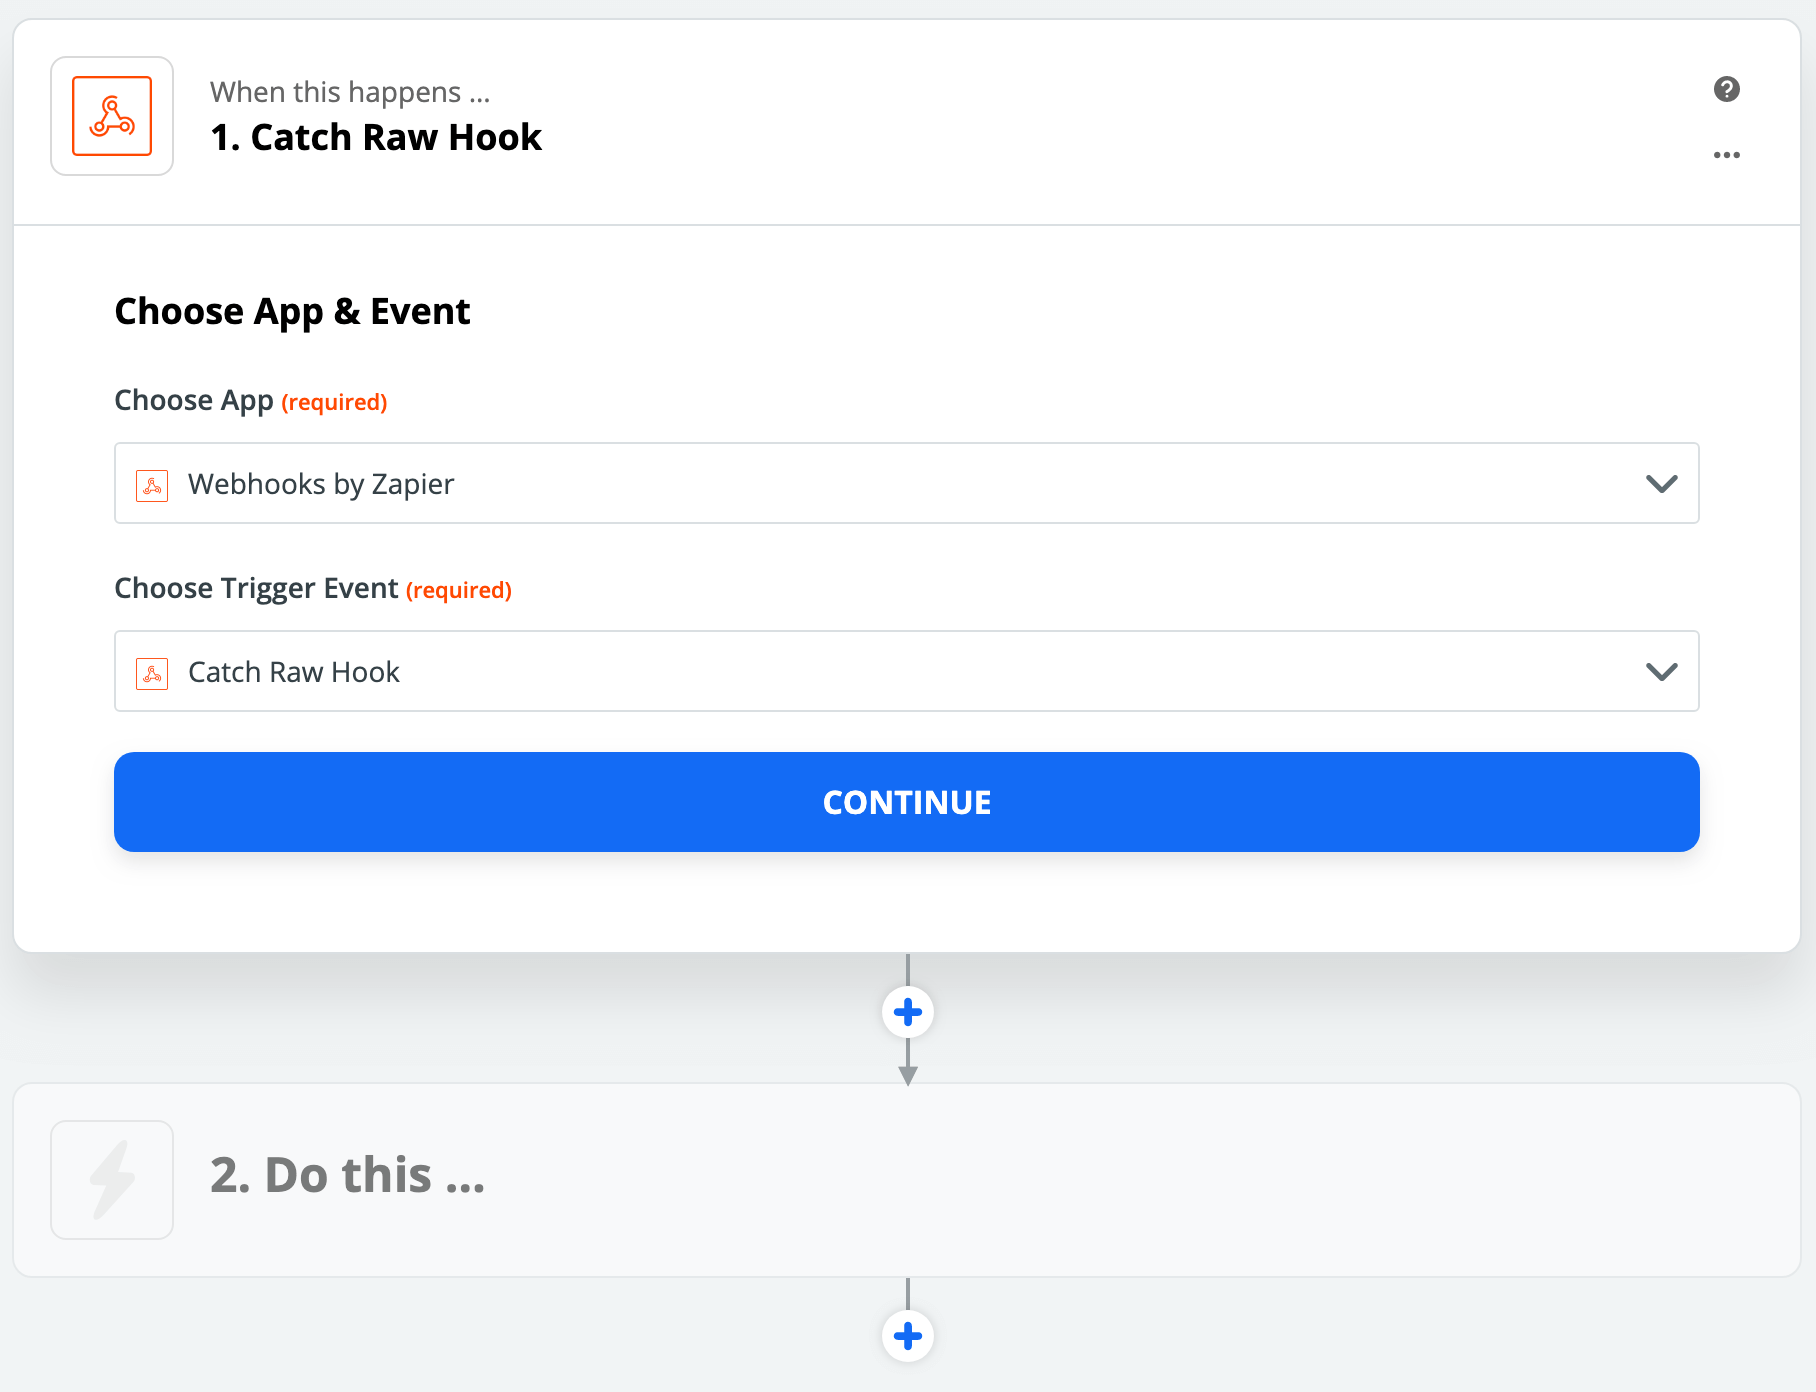
1. Log-in your Zapier account and MAKE A ZAP

2. Use the Zapier Webhook
GMail setup
1. Add in Zapier a GMail action
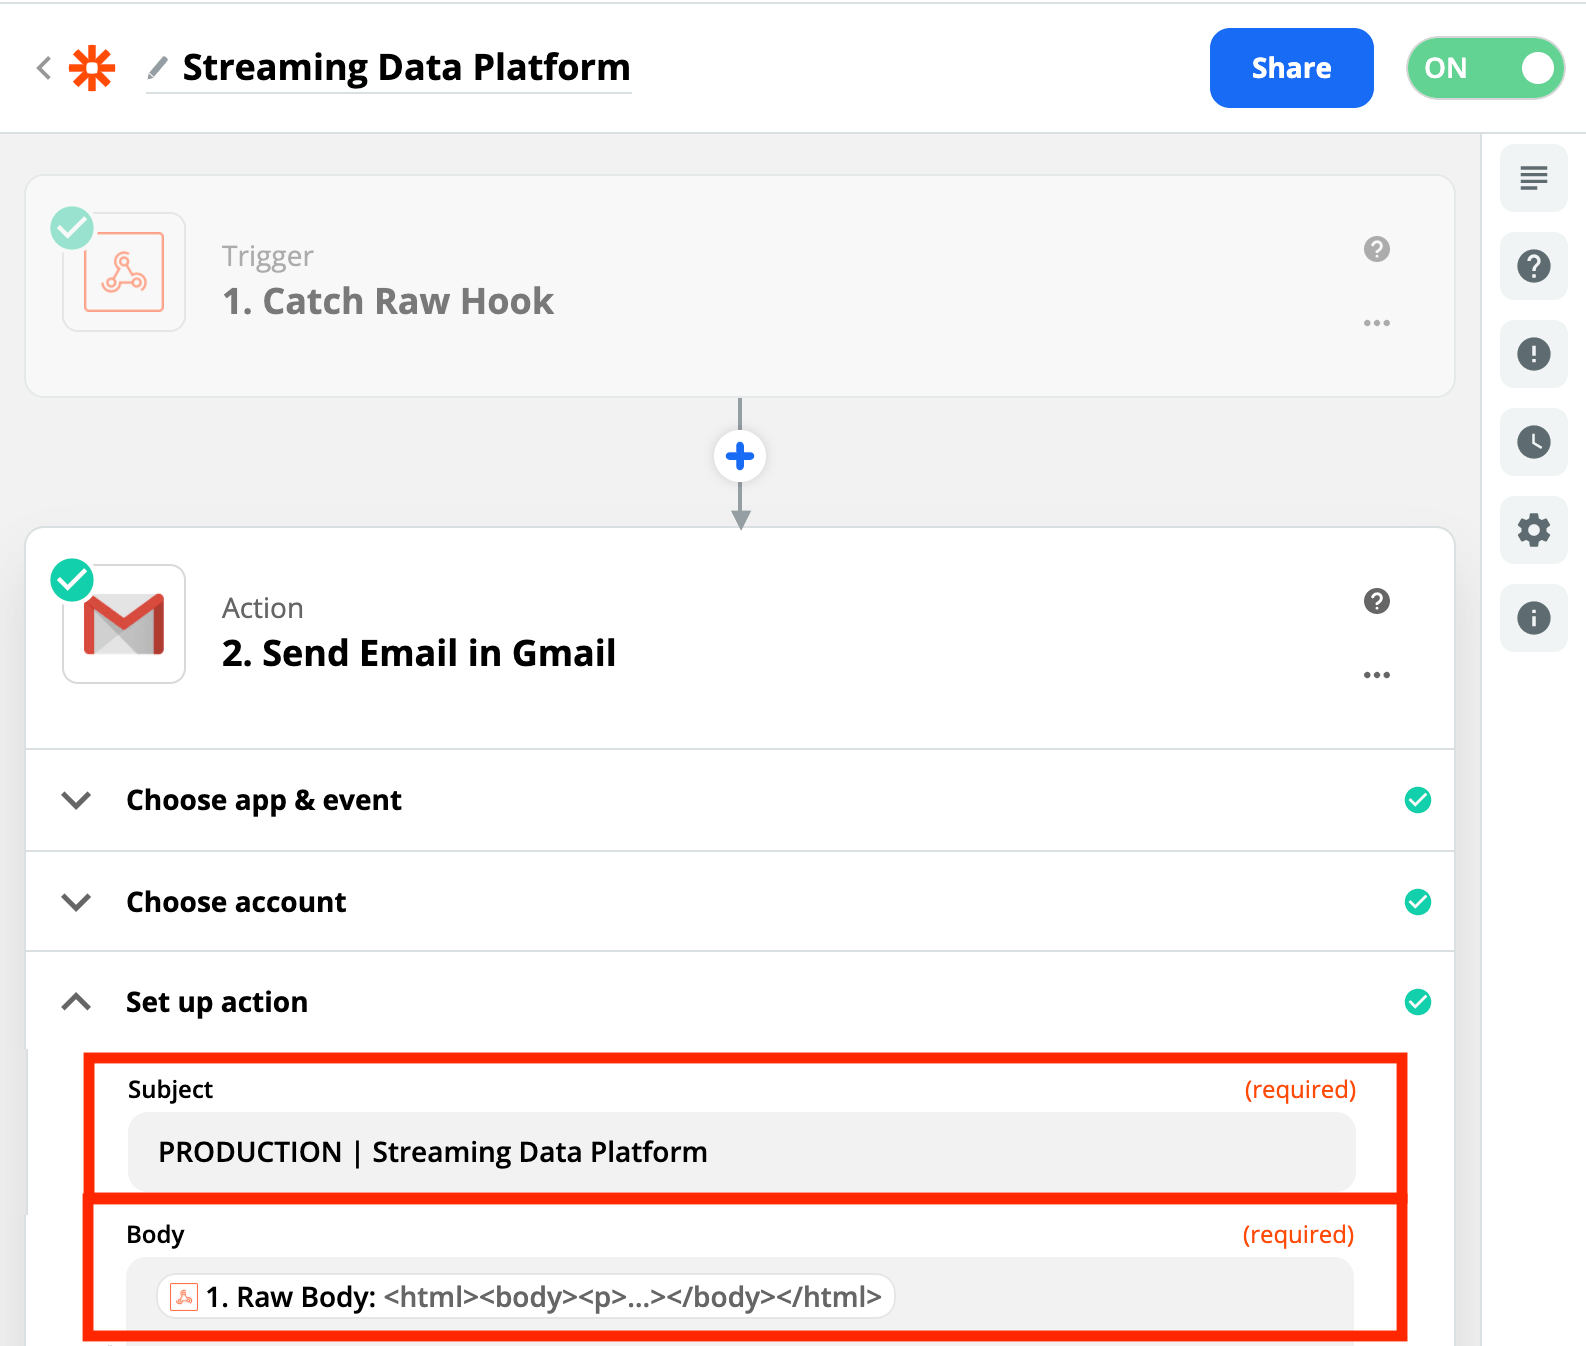
Fill in the above form, and make sure you set the appropriate Subject and select Raw Body for the Body of the email. Continue, test and Turn on Zap
Webhook setup
Learn how to setup email alerting in Lenses.io using Zapier and webhooks to notify the appropriate group on any failures in the following blog post email alerts with Zapier
1. In Lenses, visit Admin → Connections and click New connection

2. Select Webhook

3. Add the connection name and configuration for the webhook towards hooks.zapier.com and enable HTTPS
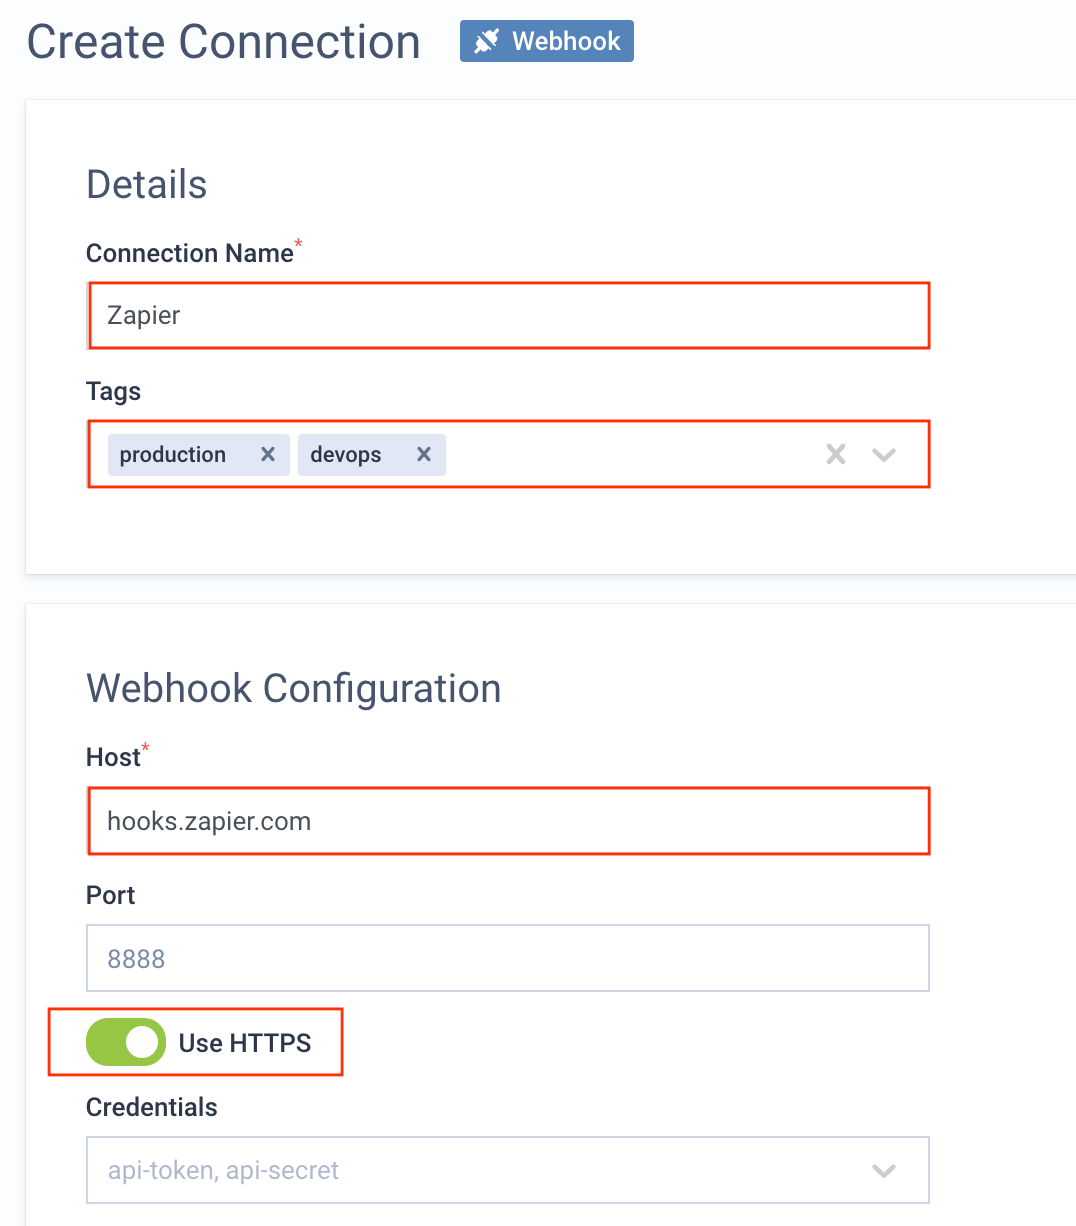
4. Visit Admin → Channels and click Webhook

And configure the new notification channel:
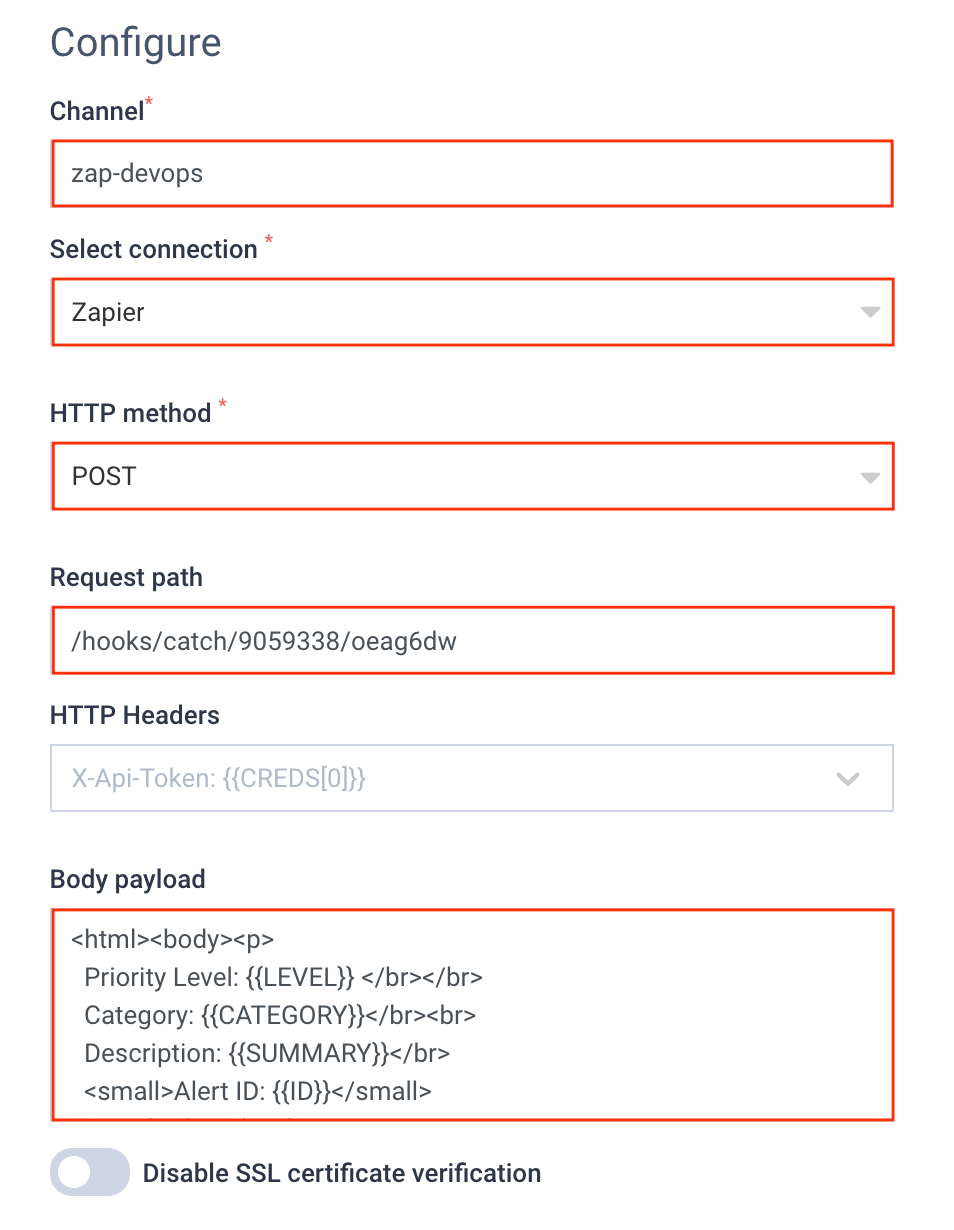
For the Body payload you use and customize the bellow snippet:
<html>
  <body>
    <h2>Streaming data platform - alert</h2>
    <p>Environment: <a href="http://enjoy.lenses.io"><b>PRODUCTION</b></a></p>
    <p>Priority Level: <b>{{LEVEL}}</b></p>
    <p>Category: <b>{{CATEGORY}}</b></p>
    <p>Summary: {{SUMMARY}}</p>
    <p>Alert ID: {{ID}}</p>
    <p><small>Lenses.io</small></p>
  </body>
</html>
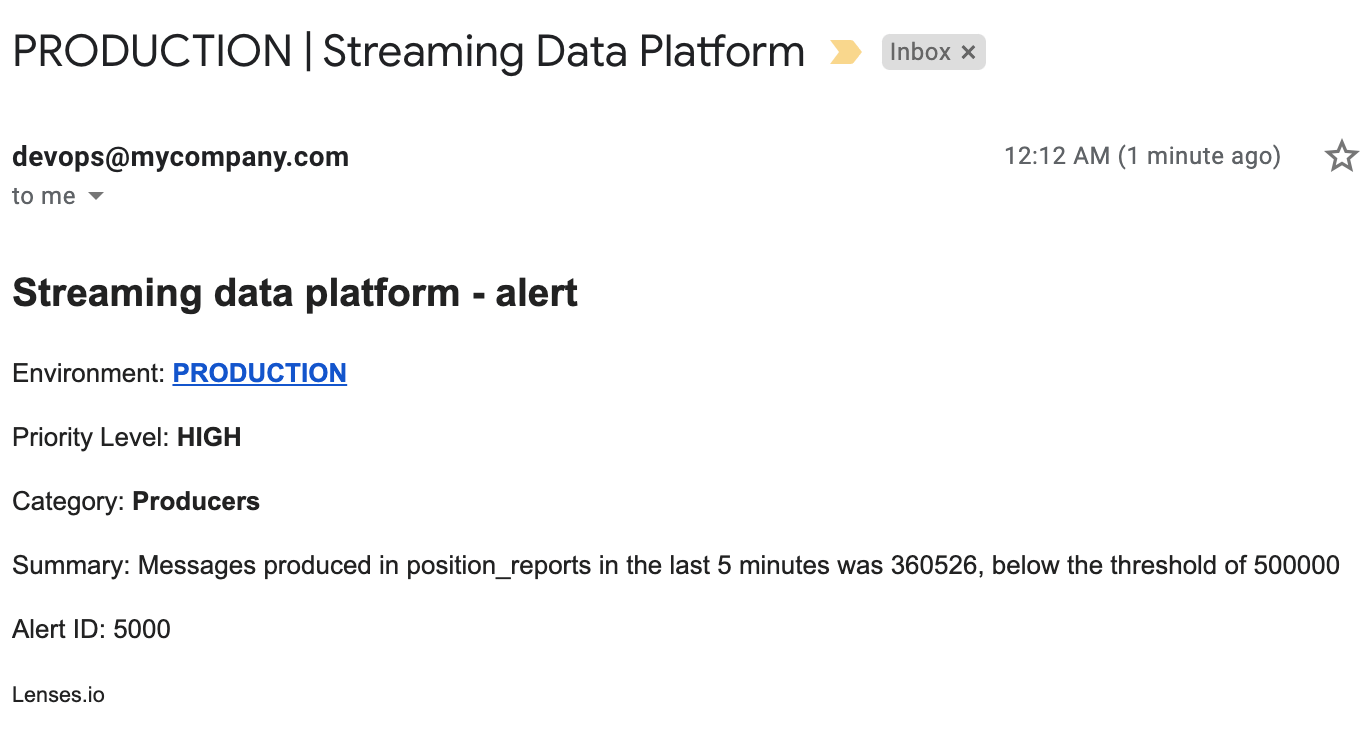
Example email
An example email will look like:
Alert routing
Once you have set up the connections and alert channels you can now create alert rules
