Supported versions: 5.0.x
Aiven
Get started with Lenses. Click here to set it up with Docker and connect to an Aiven-managed Kafka with the standard configuration.
1. Get your Lenses access key
Sign up with Lenses and download your access key.
2. Sign up for Aiven and create a Kafka
Aiven for Apache Kafka is a fully managed streaming platform, deployable in the cloud of your choice.
Start by signing up for an Aiven account . Follow the in-product instructions to launch Kafka clusters within the Aiven user interface.
![]()
3. Running Lenses with Docker
Run the following in a terminal:
docker run -e LENSES_PORT=8080 -p 8080:8080 lensesio/lenses
A message similar to the following should appear in the logs:
2021-12-16 18:17:04,322 INFO [i.l.b.r.HttpServer] [ioapp-compute-6] Lenses http server started and listening to requests.
4. Login
Open your browser and go to:
http://localhost:8080
Login as admin:
User:     admin
Password: admin
5. Wizard Setup
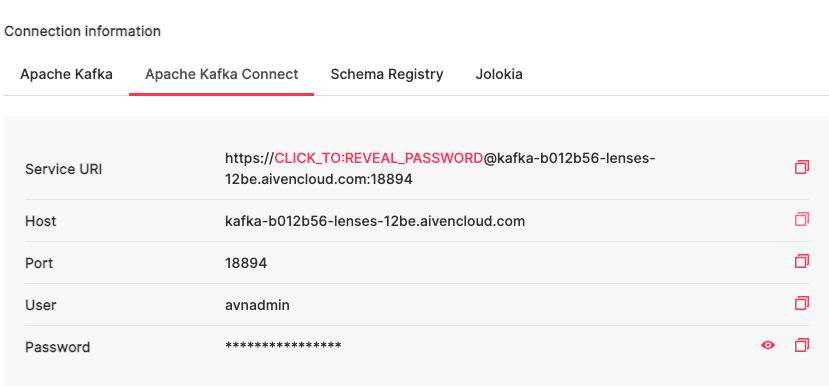
From the aiven console on the Connection information Apache Kafka tab select as an Authentication Method SASL.
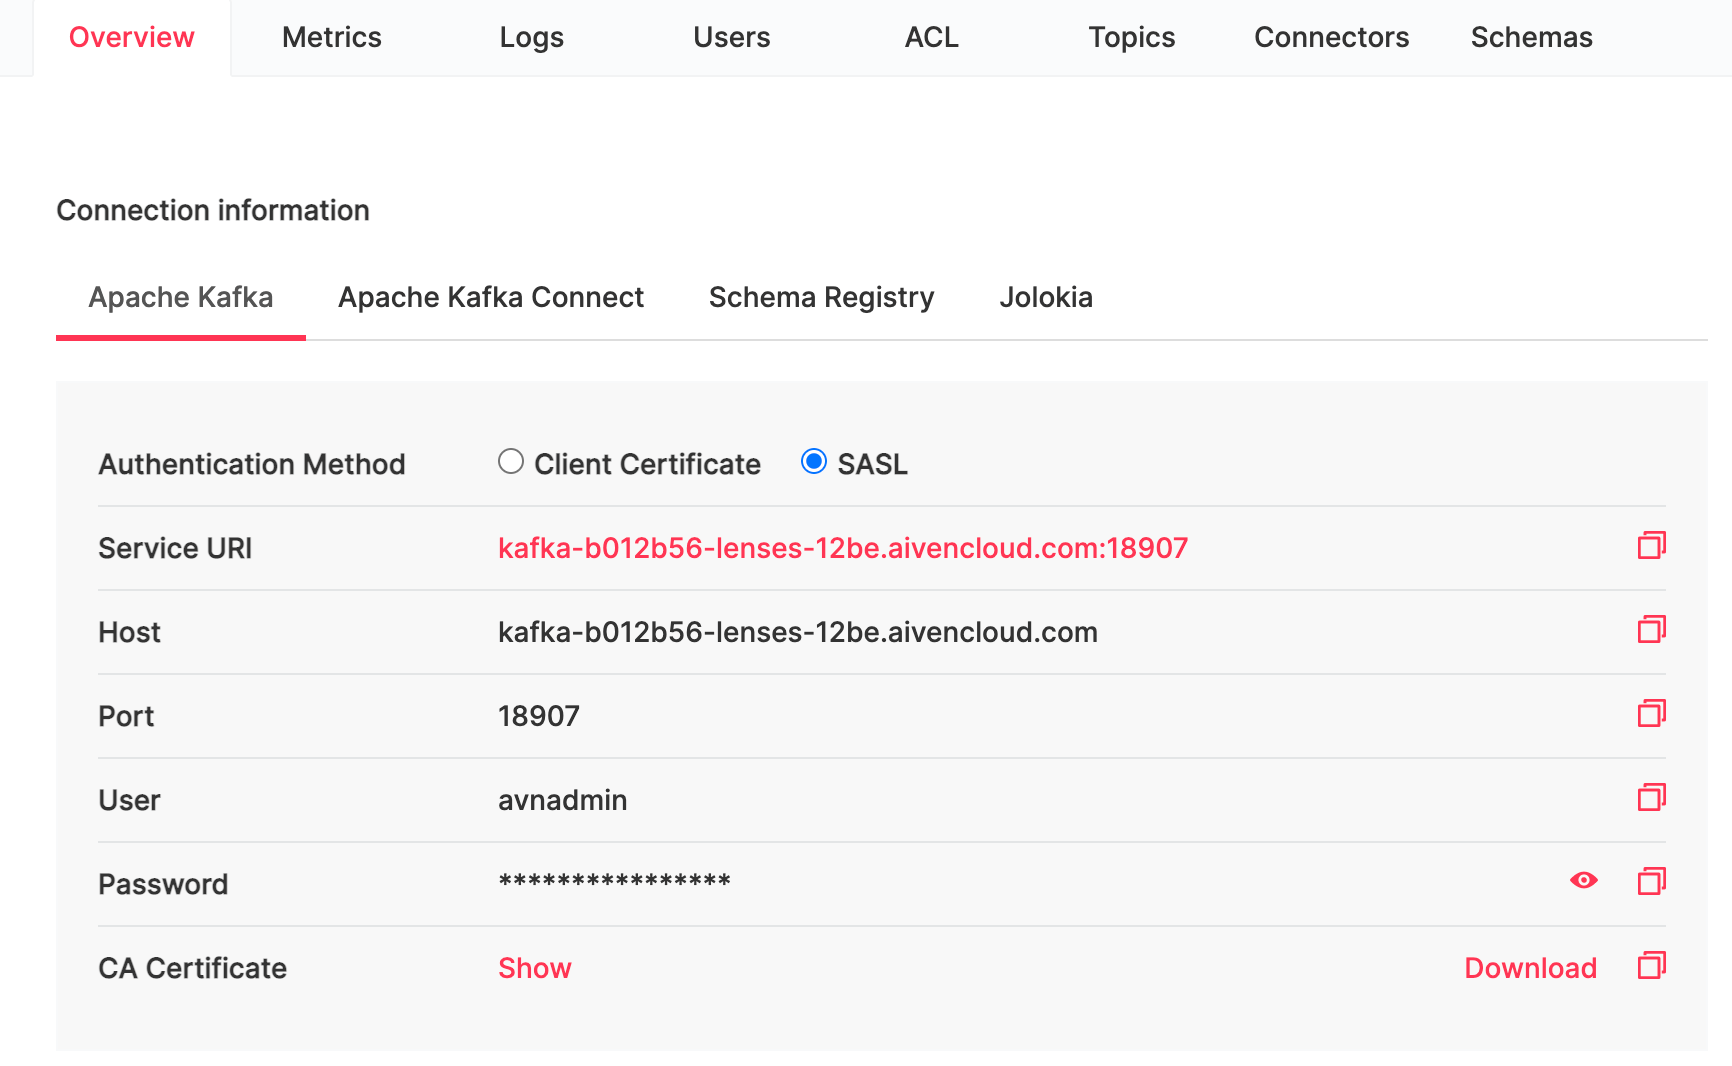
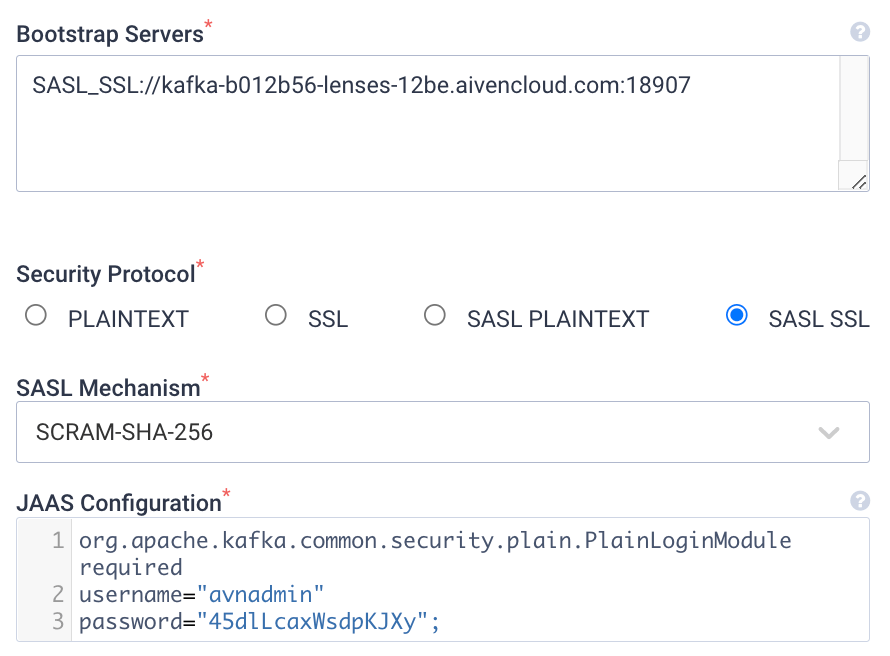
Grab the Service URI, place it on the wizard Bootstrap Servers and select as Security Protocol SASL SSL with SASL Mechanism SCRAM-SHA-256.
On the JAAS Configuration update the username and password from the respective fields User and Password on the Aiven console.
org.apache.kafka.common.security.plain.PlainLoginModule required
username="[Your_Connection_Details_Username]"
password="[Your_Connection_Details_Password]"
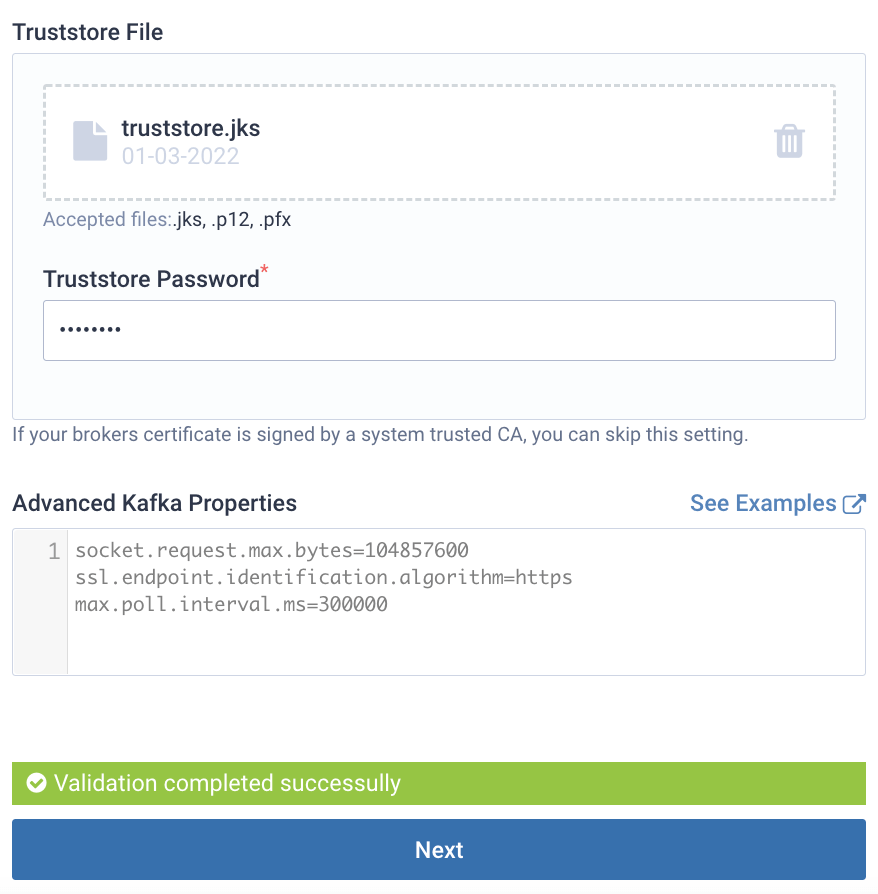
Trustore.jks
Open a new cli tab and execute the Aiven-cli command - in case of not having the Aiven-cli installed, you can get it from https://developer.aiven.io/docs/tools/cli :
avn service user-kafka-java-creds <YOUR SERVICE NAME> --username <YOUR AIVEN EMAIL> -d <DIRECTORY TO PRODUCE THE FILE> --password <A PASSWORD FOR YOUR TRUSTORE>
The command above will create 3 files at the directory that we specified:
- ca.per
- ca.pem
- client.trustore.jks
On the same directory run the command:
docker run \
    -v ${PWD}/ca.pem:/tmp/file.pem:ro \
    -v ${PWD}/:/output \
    -it --rm lensesio/lenses:5.0.0 /usr/bin/keytool \
    -importcert \
    -noprompt \
    -trustcacerts \
    -keystore /output/truststore.jks \
    -alias “aivenjks” \
    -file /tmp/file.pem \
    -storepass changeit \
    -storetype JKS
This will create a trustore.jks on the same directory, with a password of changeit.
Proceed by adding the trustore file on the wizard, with its password - changeit.
Click on Test Kafka Brokers. And you should get the message: Validation completed successfully.
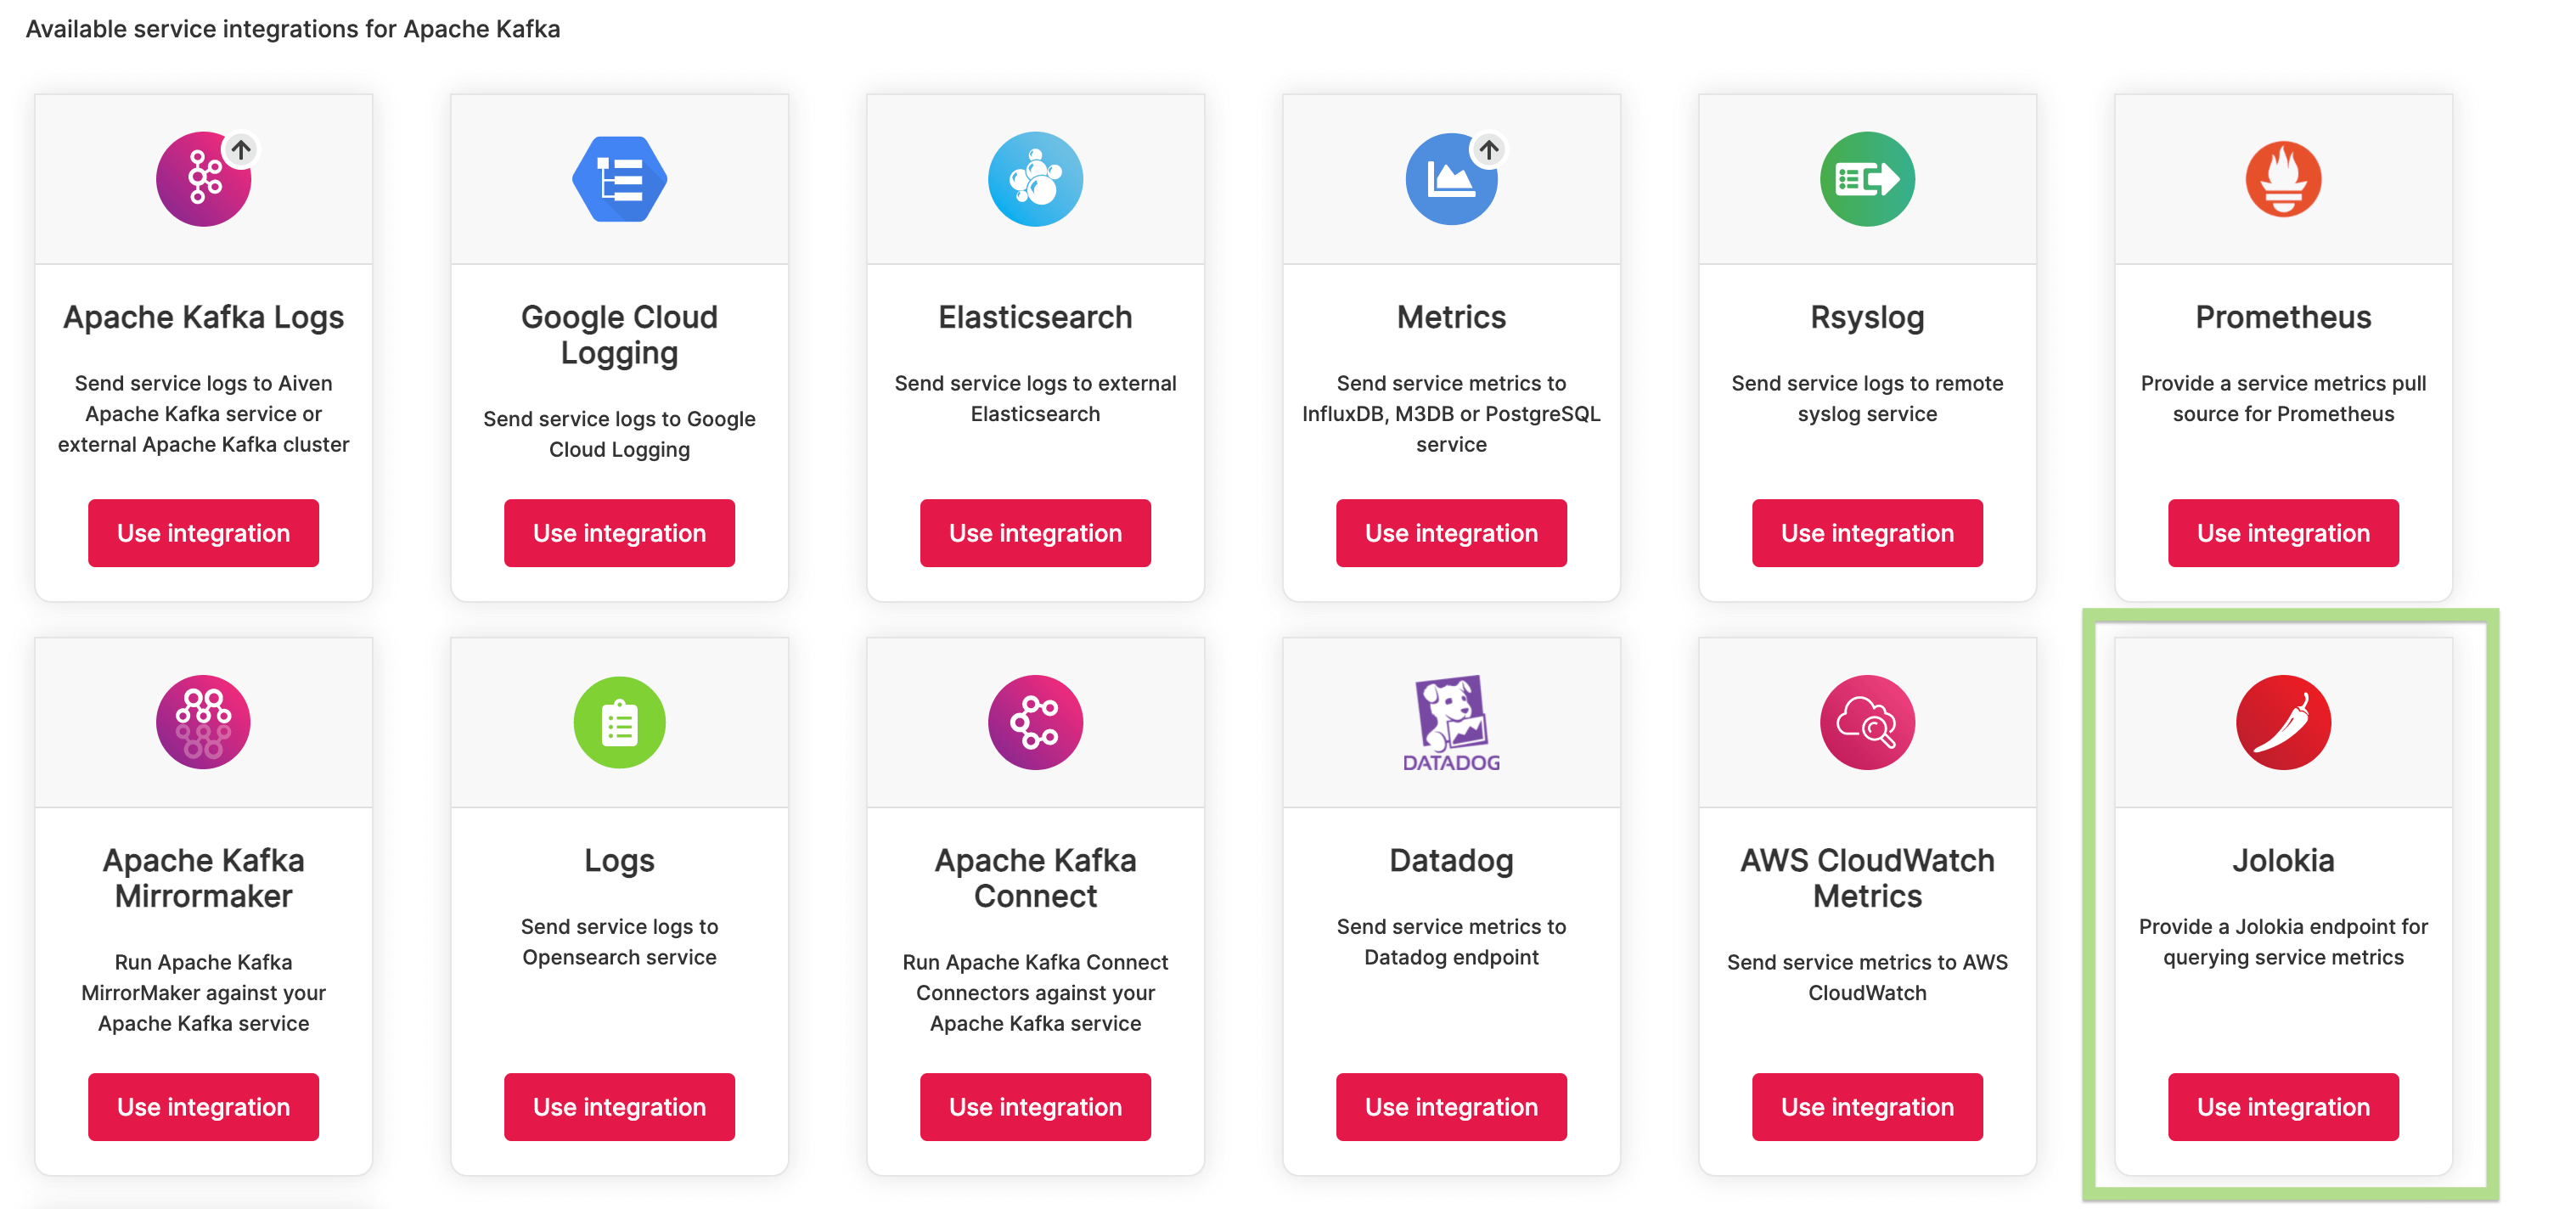
6. Kafka Metrics (Optional)
Add Jolokia integration to enable JMX Metrics
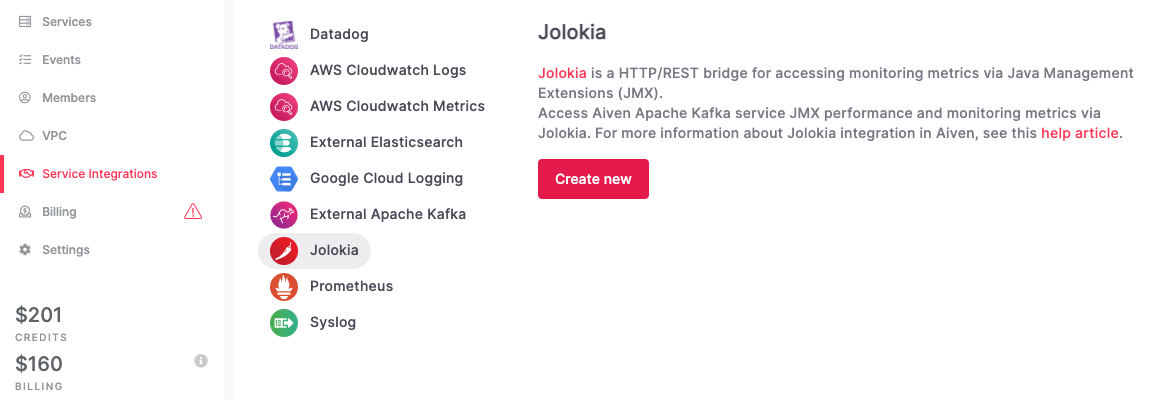
From the Aiven platform interface select: Service Integrations=> Jolokia => Create new
Provide the enpoint name, Username and Password.
Enable Metrics Integration
From the Overview tab, scroll down to “Service Integrations”. Click on Manage Integrations From the popup select Jolokia - Use Integration - and then enable:

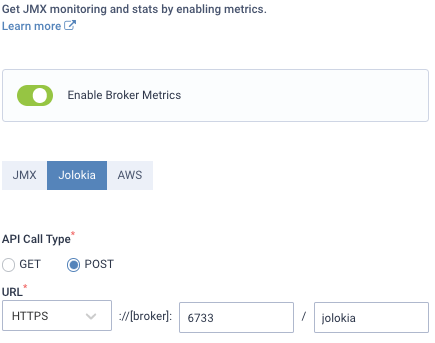
Back to the wizard step 3, select:
- Jolokia,
- API Call Type: POST
- URL: HTTPS
- Add Port Number: 6733
- Add /jolokia
As shown in the figure:
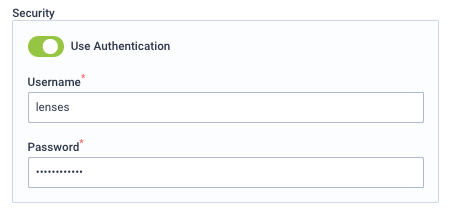
Then toggle on the Use Authentication option, and from Aiven Service grab the username and the Password from: Service Integrations=>Jolokia=> Endpoint Name, as you defined above.
Click on Test Broker Metrics. And you should get the message: Validation completed successfully.
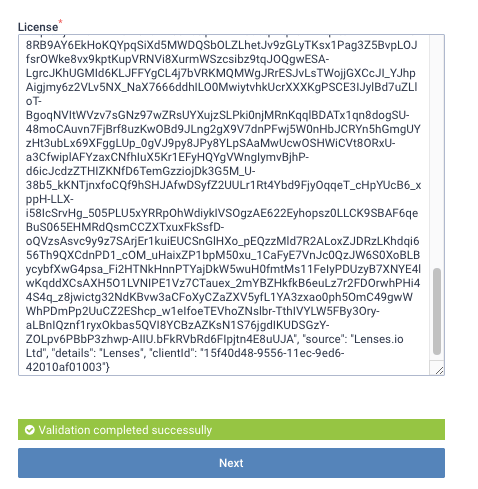
7. Lenses License
Next add your license by copy and pasting the JSON file you downloaded from your email. Again you should get the message: Validation completed successfully.
8. Validation
Click on Save & Boot Lenses. It will shortly validate the configurations
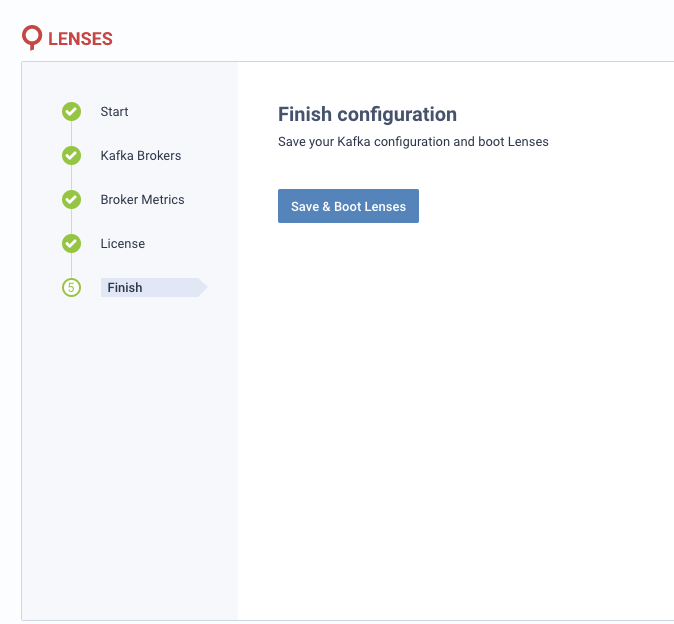
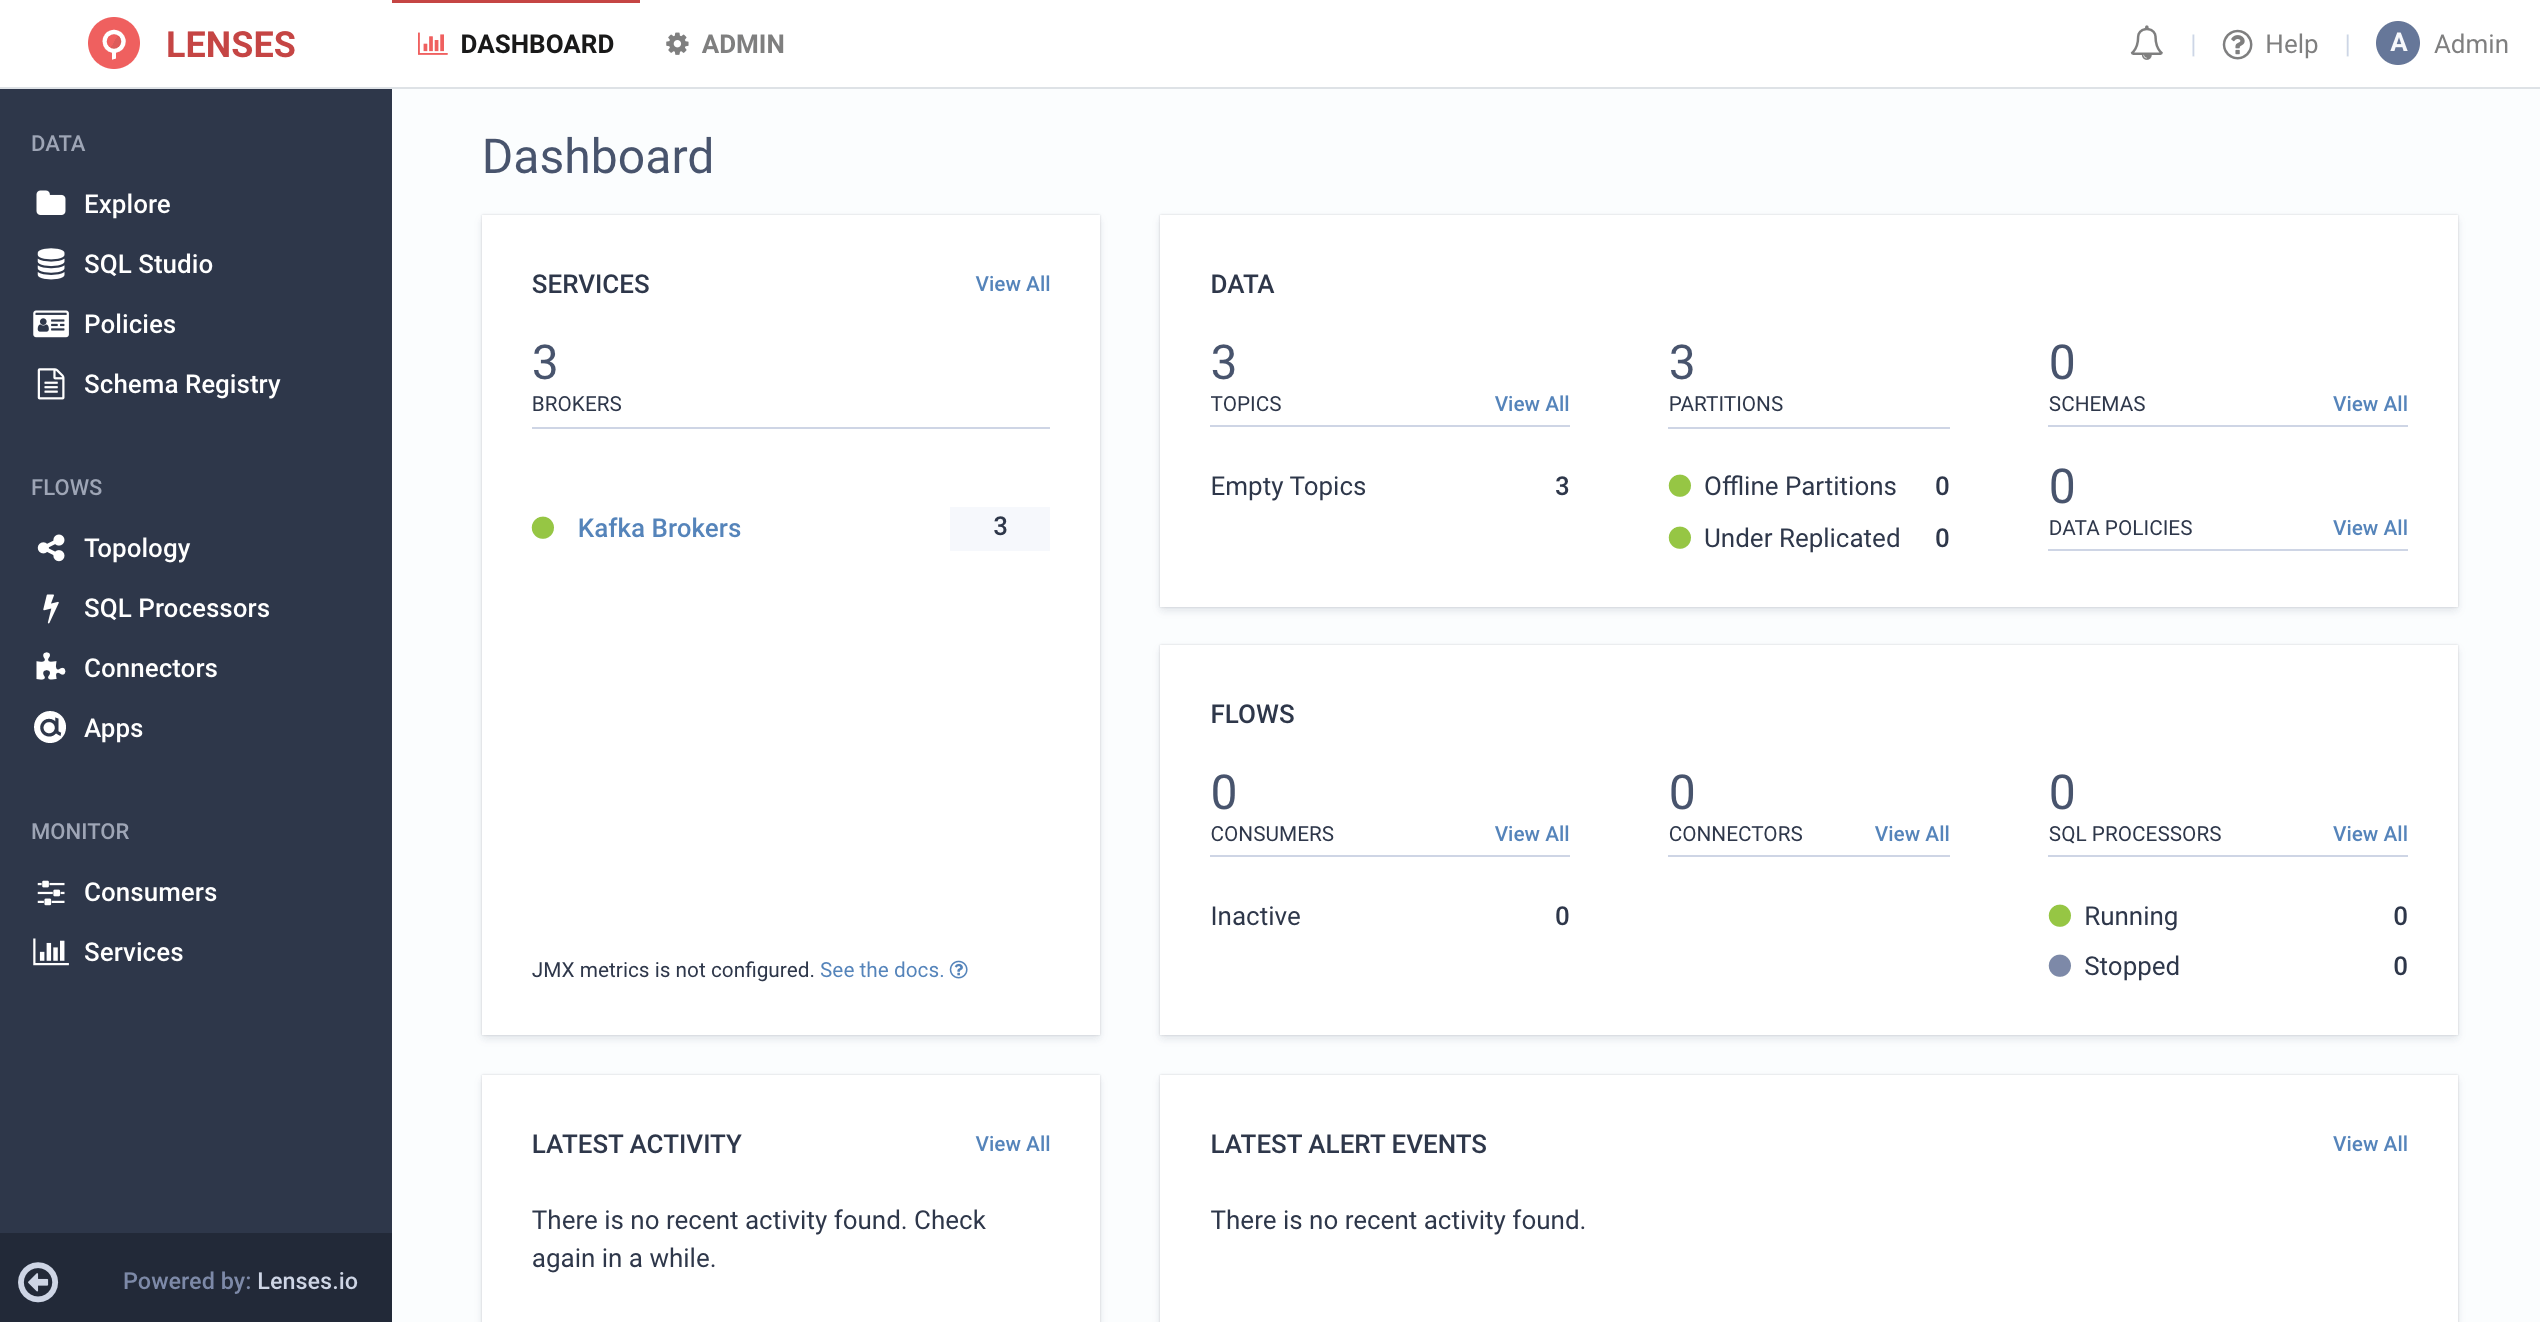
9. Eureka!
Additional Kafka features
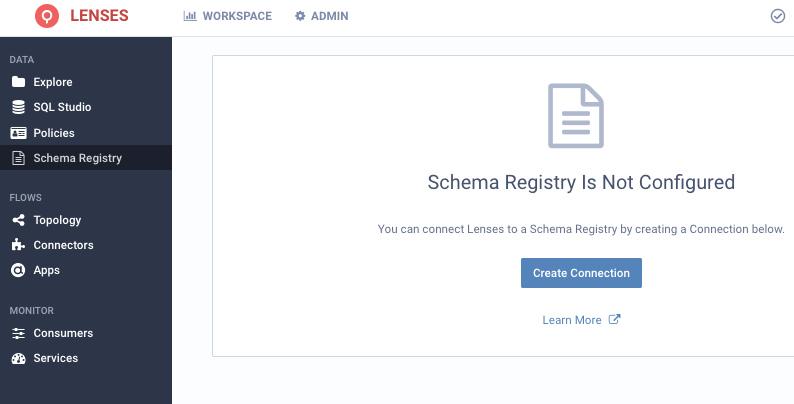
Enable Schema Registry
From Lenses Select Schema Registry => Create Connection.
On the aiven platform enable Schema Registry:

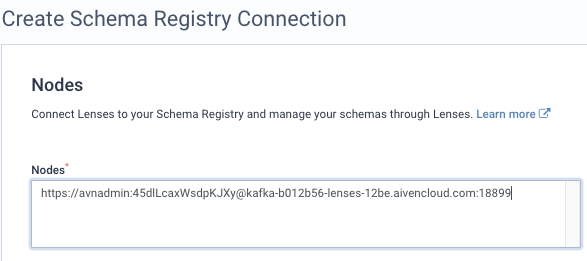
On the Overview tab select Schema Registry from the connection information and grab the Service URI:

Paste that in the Nodes, and click on Test Schema Registry Connection.
You should get a validation message similar to:
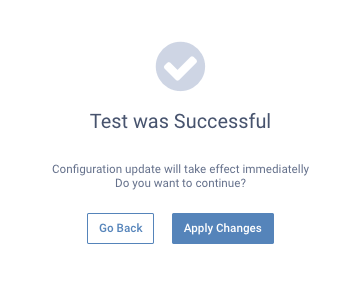
Click on Apply Changes.
Enable Kafka Connect

Similarly to the Scema Registry grab the Service URI from the Aiven Platform from the Apache Kafka Connect tab.
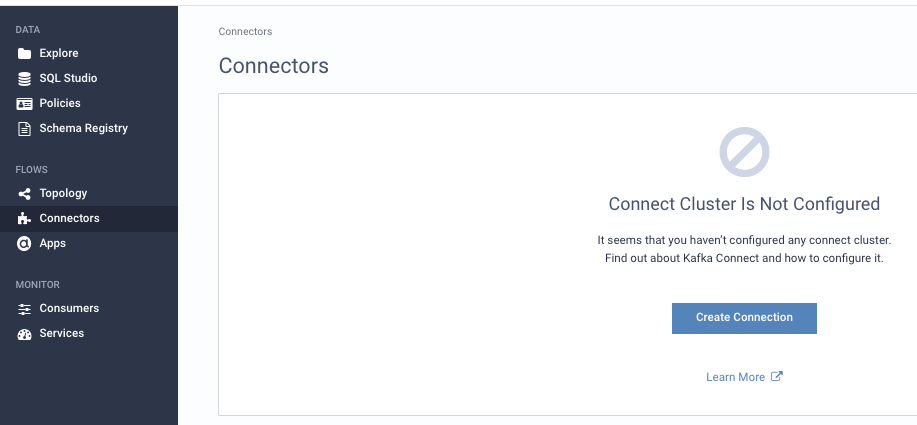
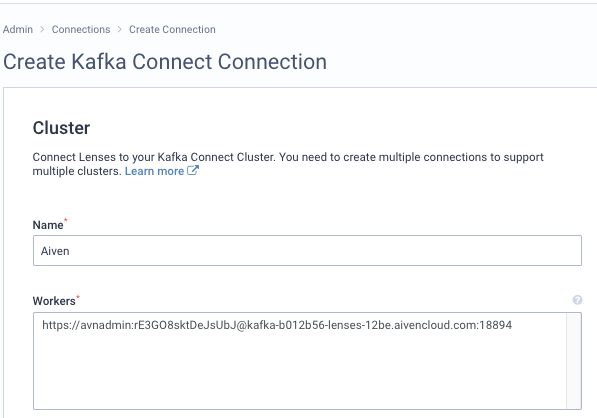
Back to Lenses select select connectors and create Connection:
Give it a name, and on the workers paste the uri:
Click on Test Kafka Connect Connection and similar to Schema Registry, hit on Apply Changes.